Schedule a future change of hours
- 1
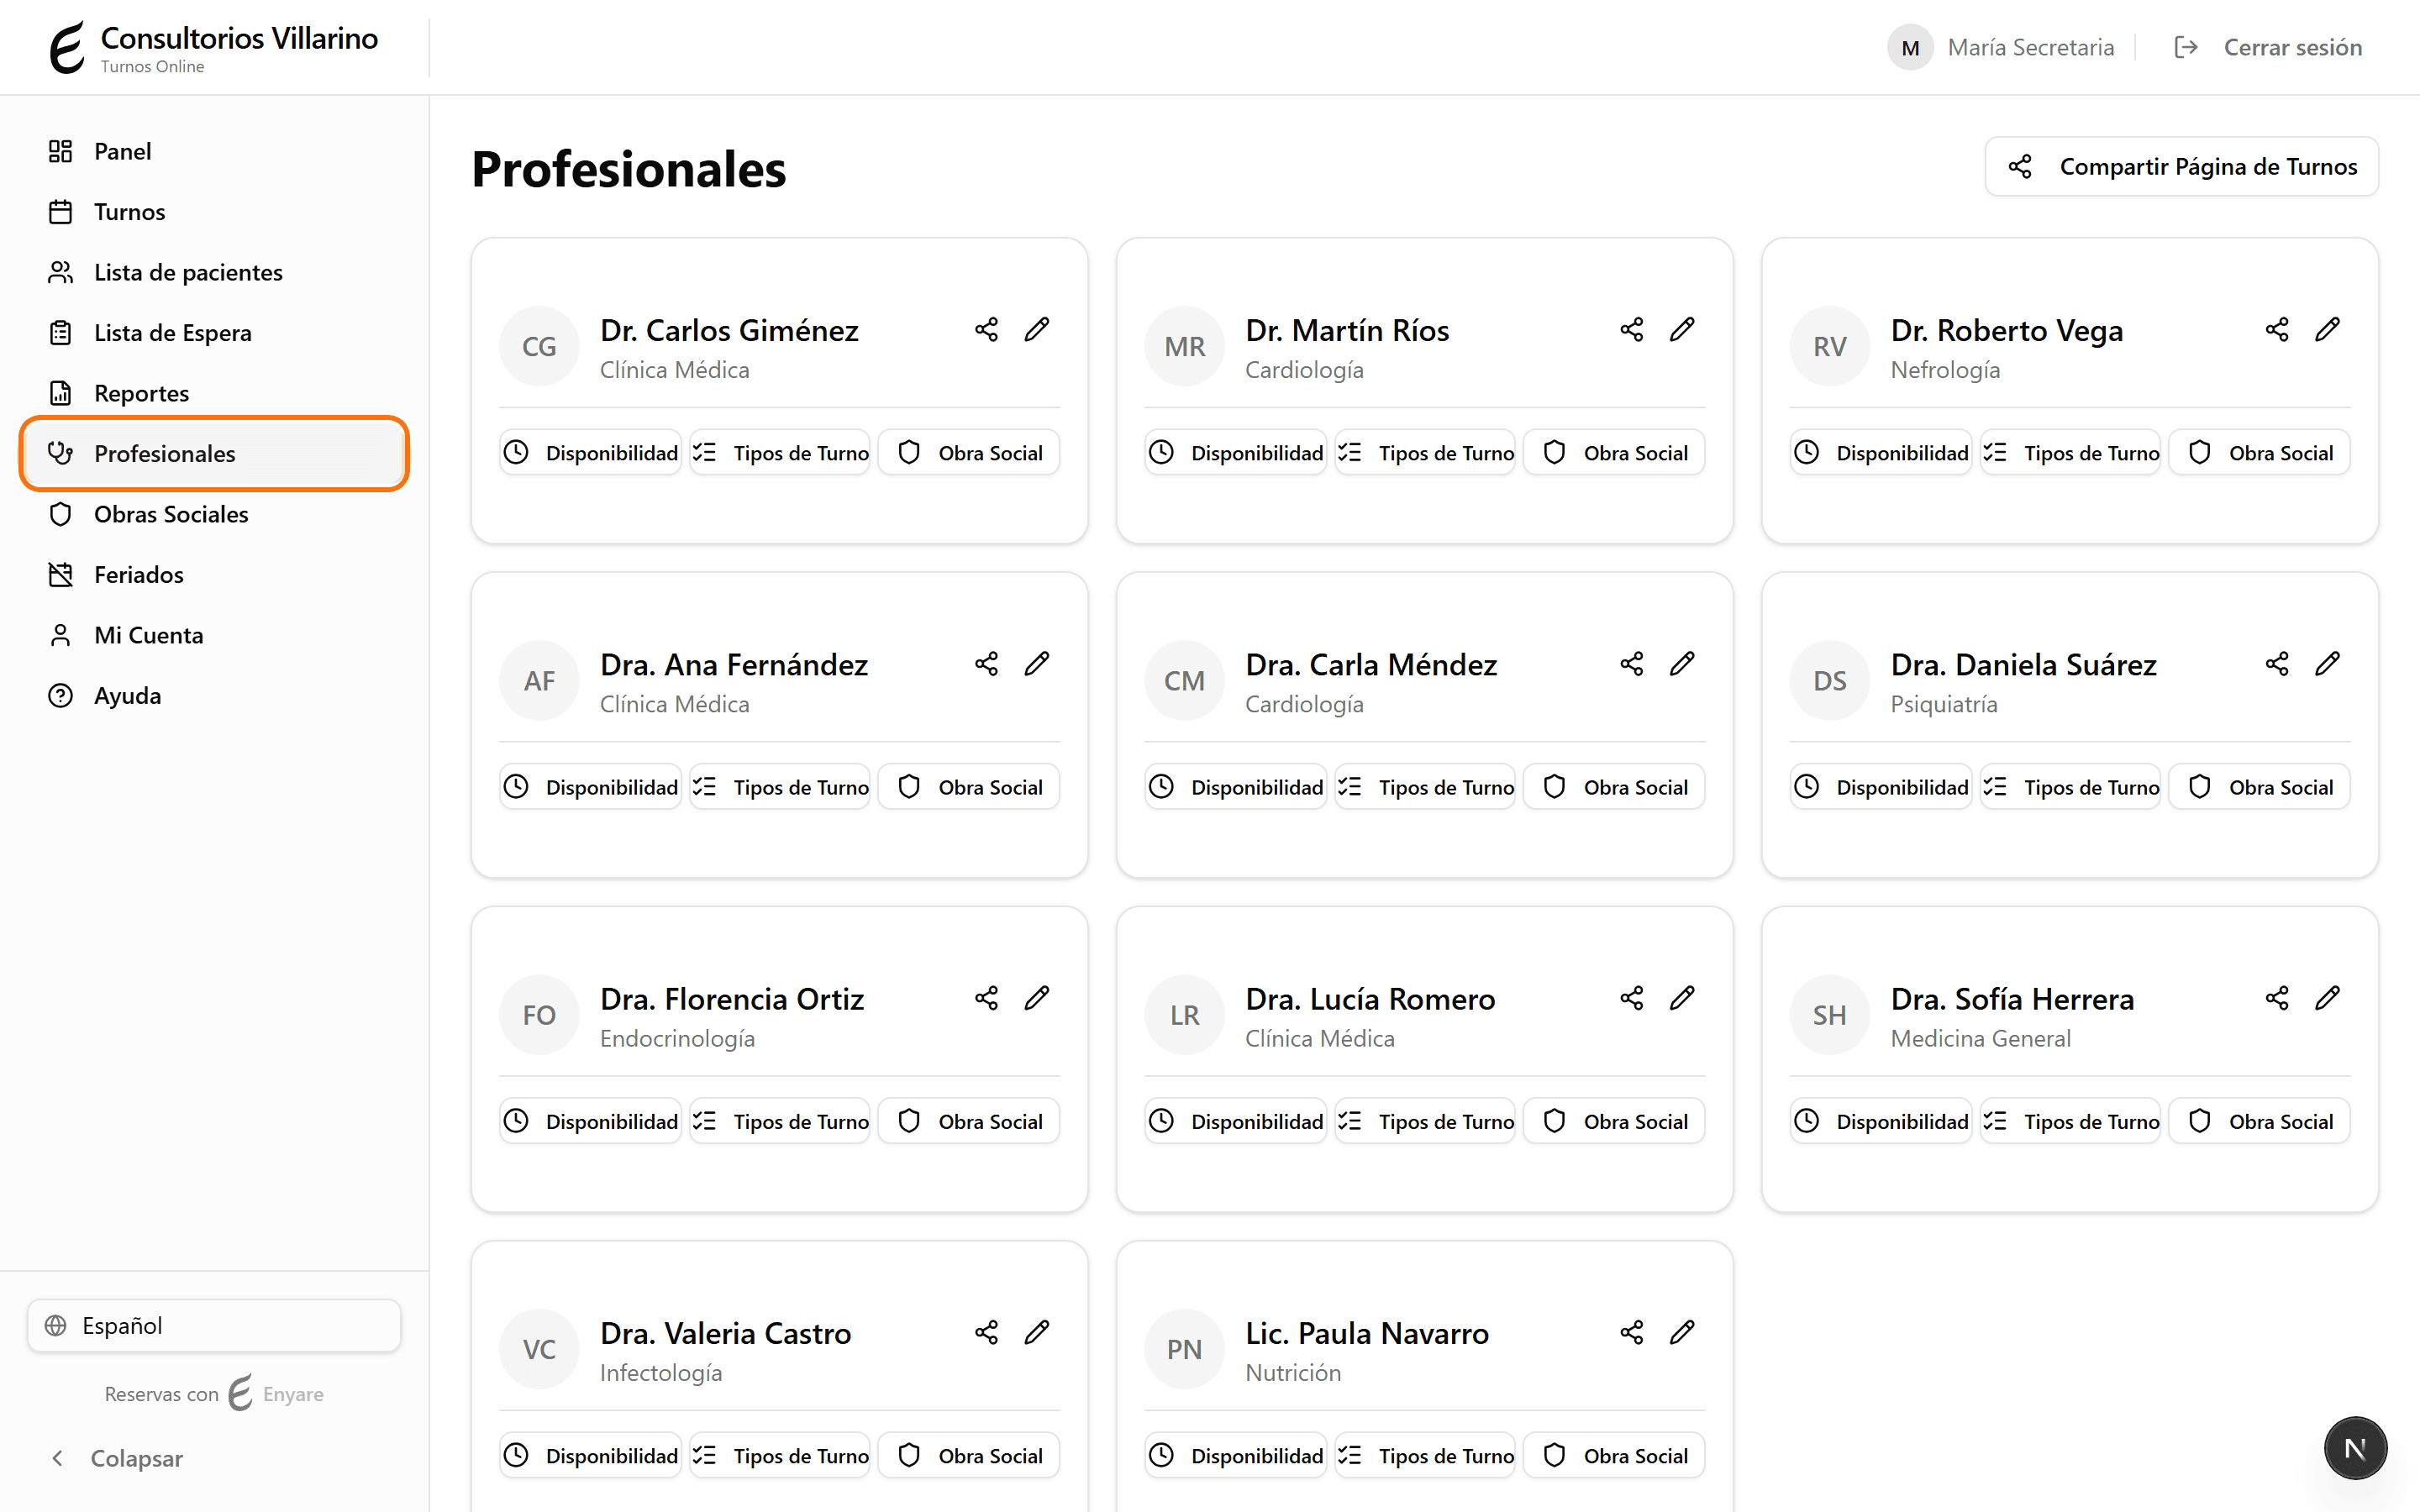
Open the professional's “Availability”
In the sidebar, open “Professionals”, go into the professional and click “Availability”. You'll see the “Weekly schedule” tab with the current hours.
- 2
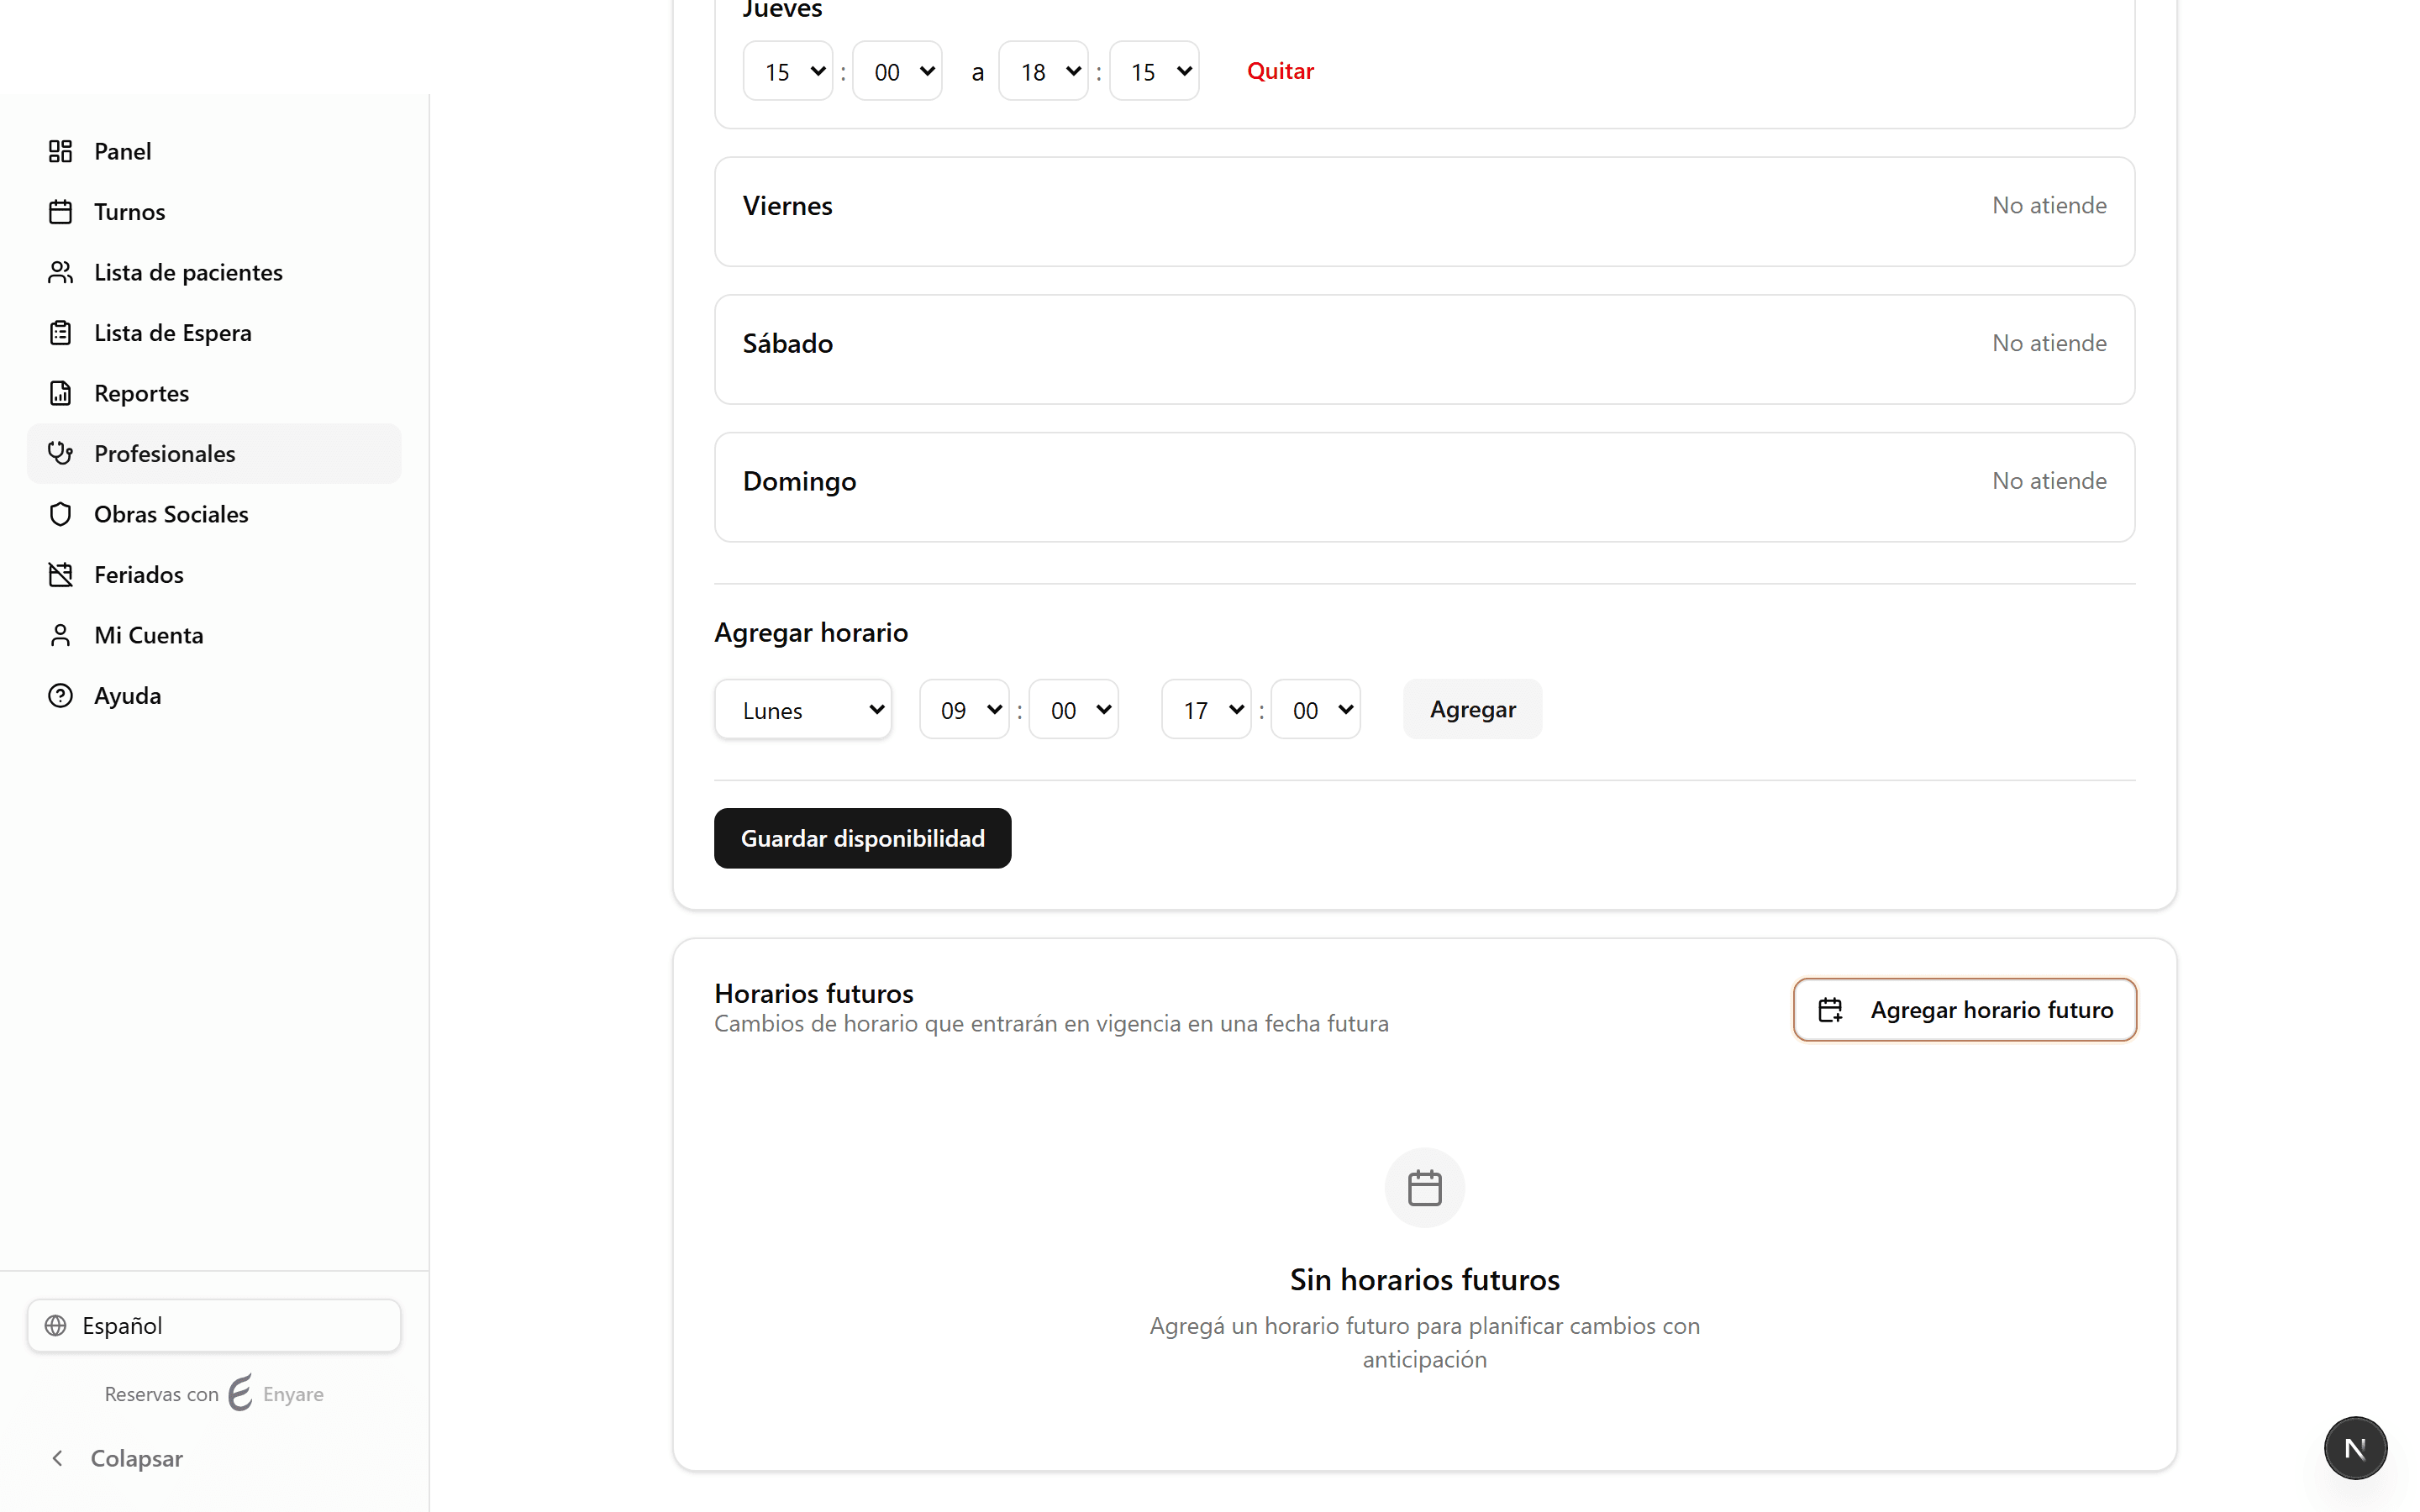
Find “Future schedules”
Below the weekly schedule is the “Future schedules” section, for changes that take effect later (the weekly schedule above applies immediately; this one doesn't). Click “Add future schedule”.
- 3
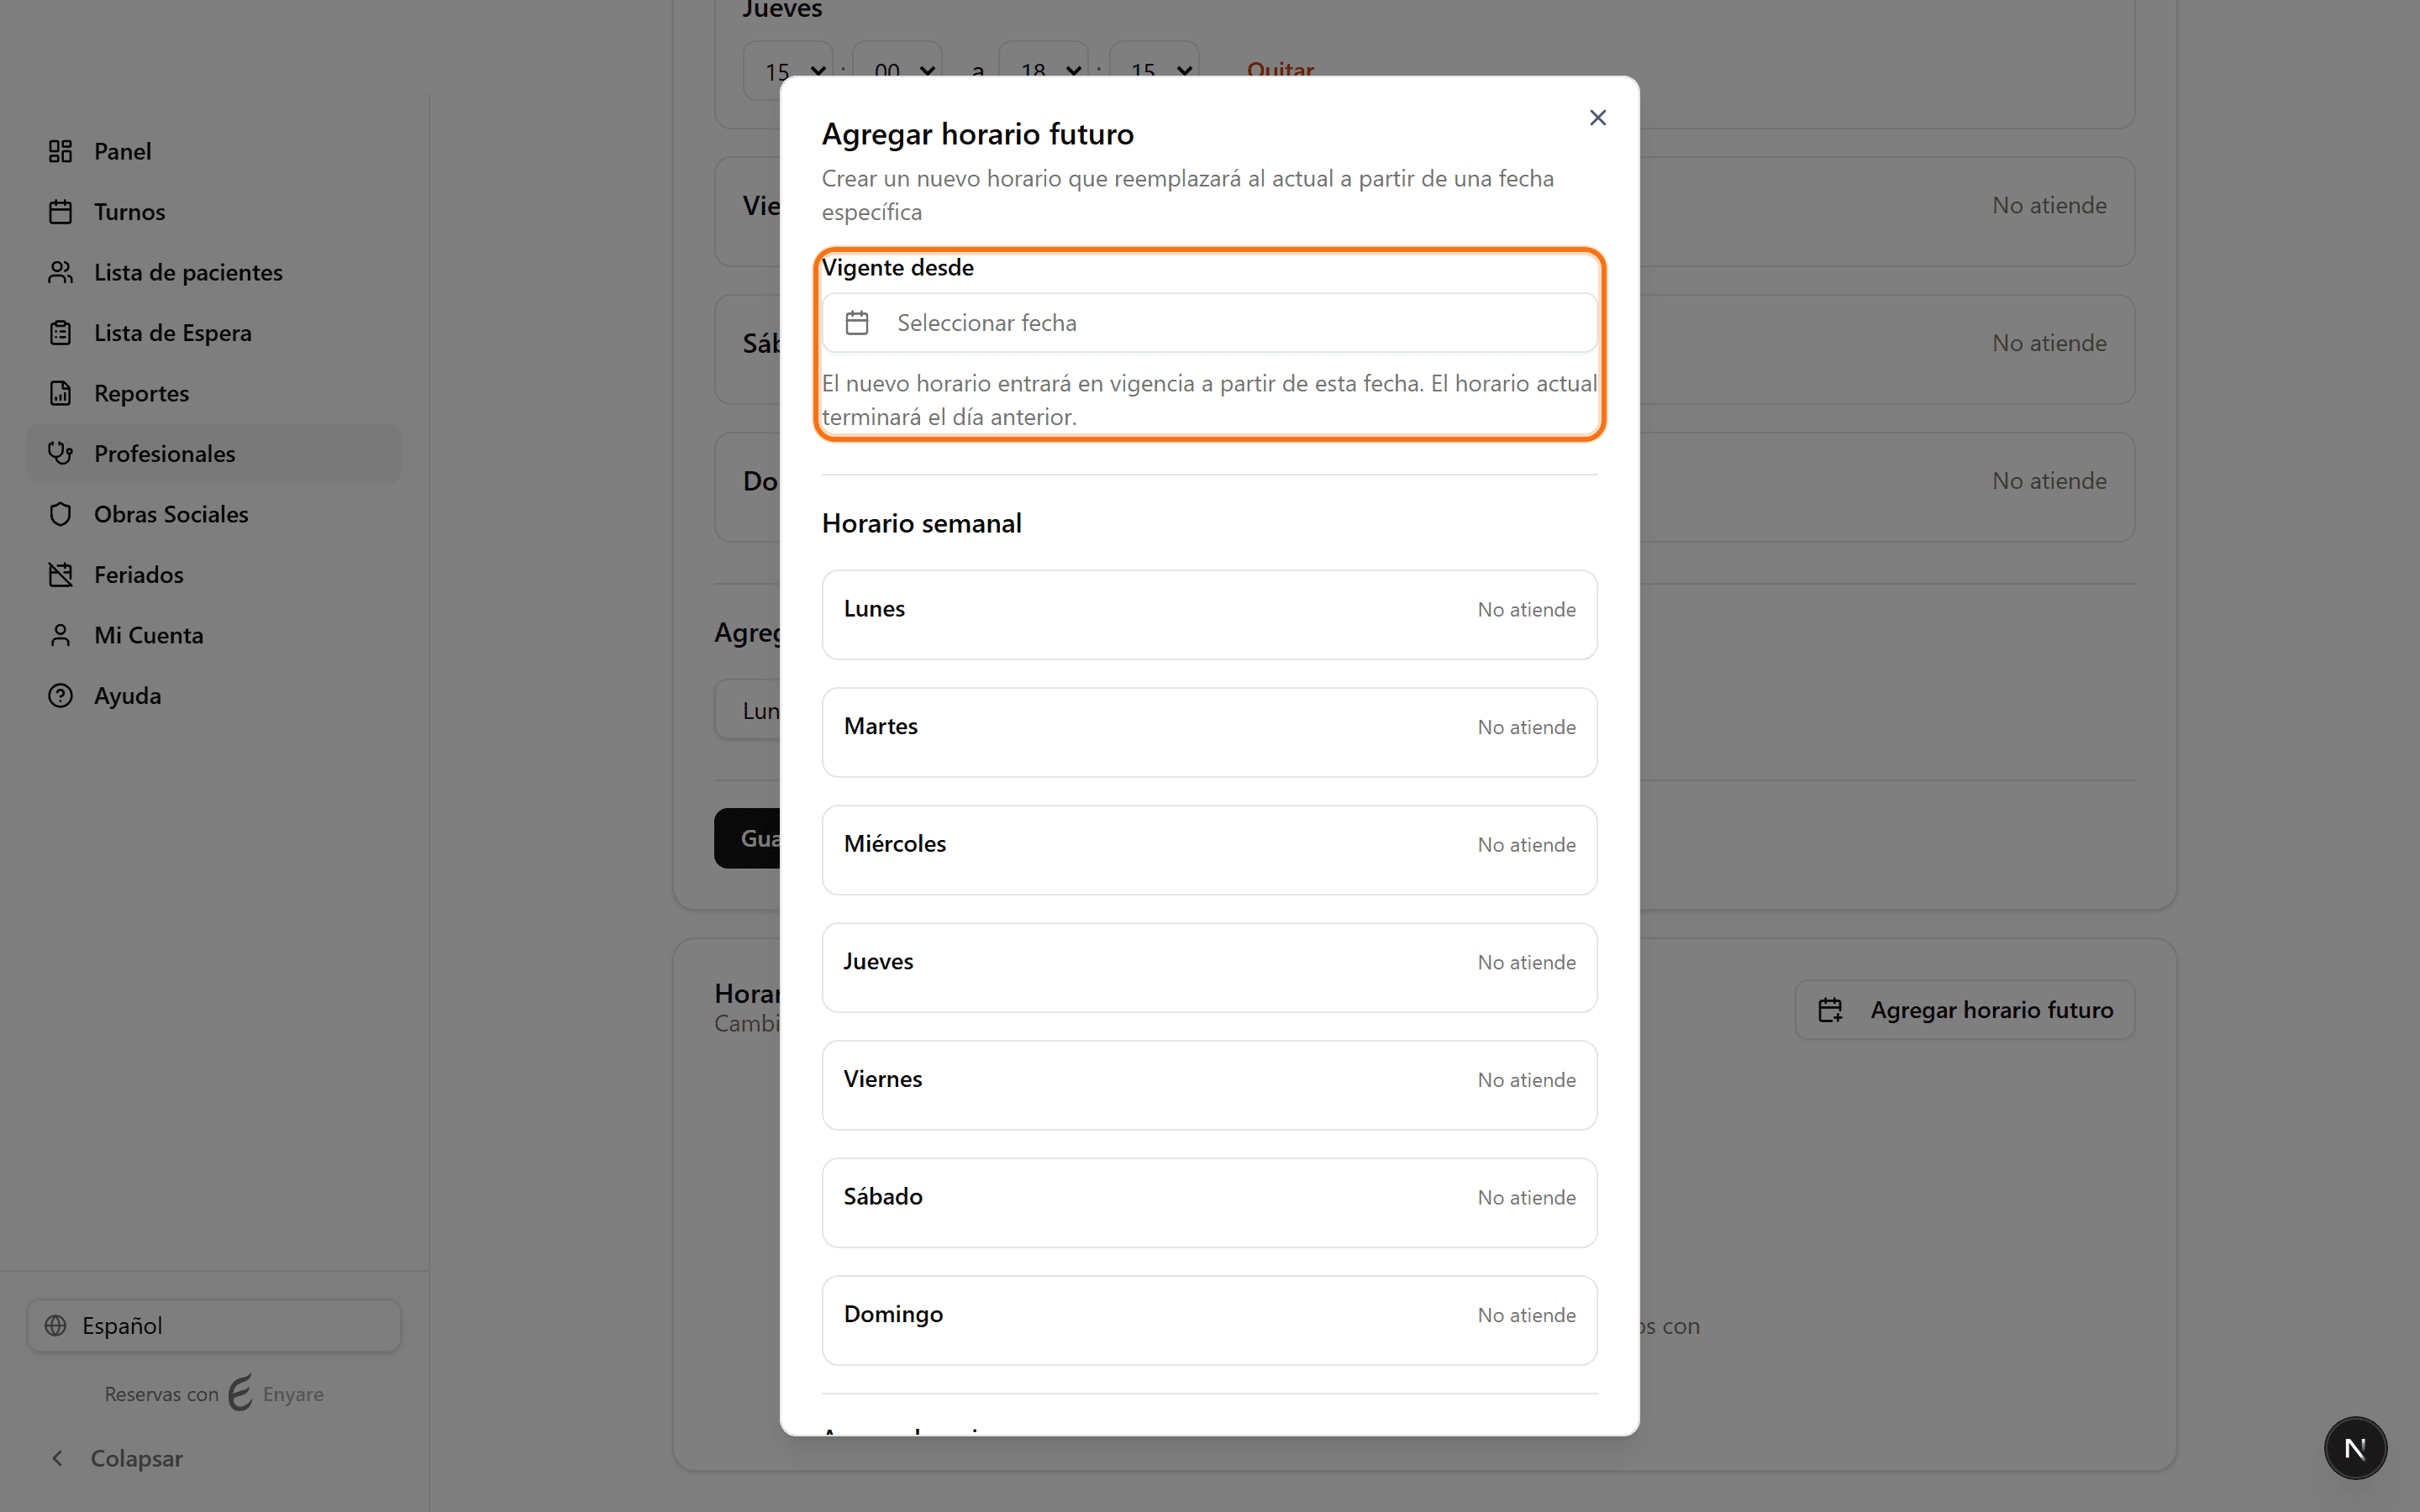
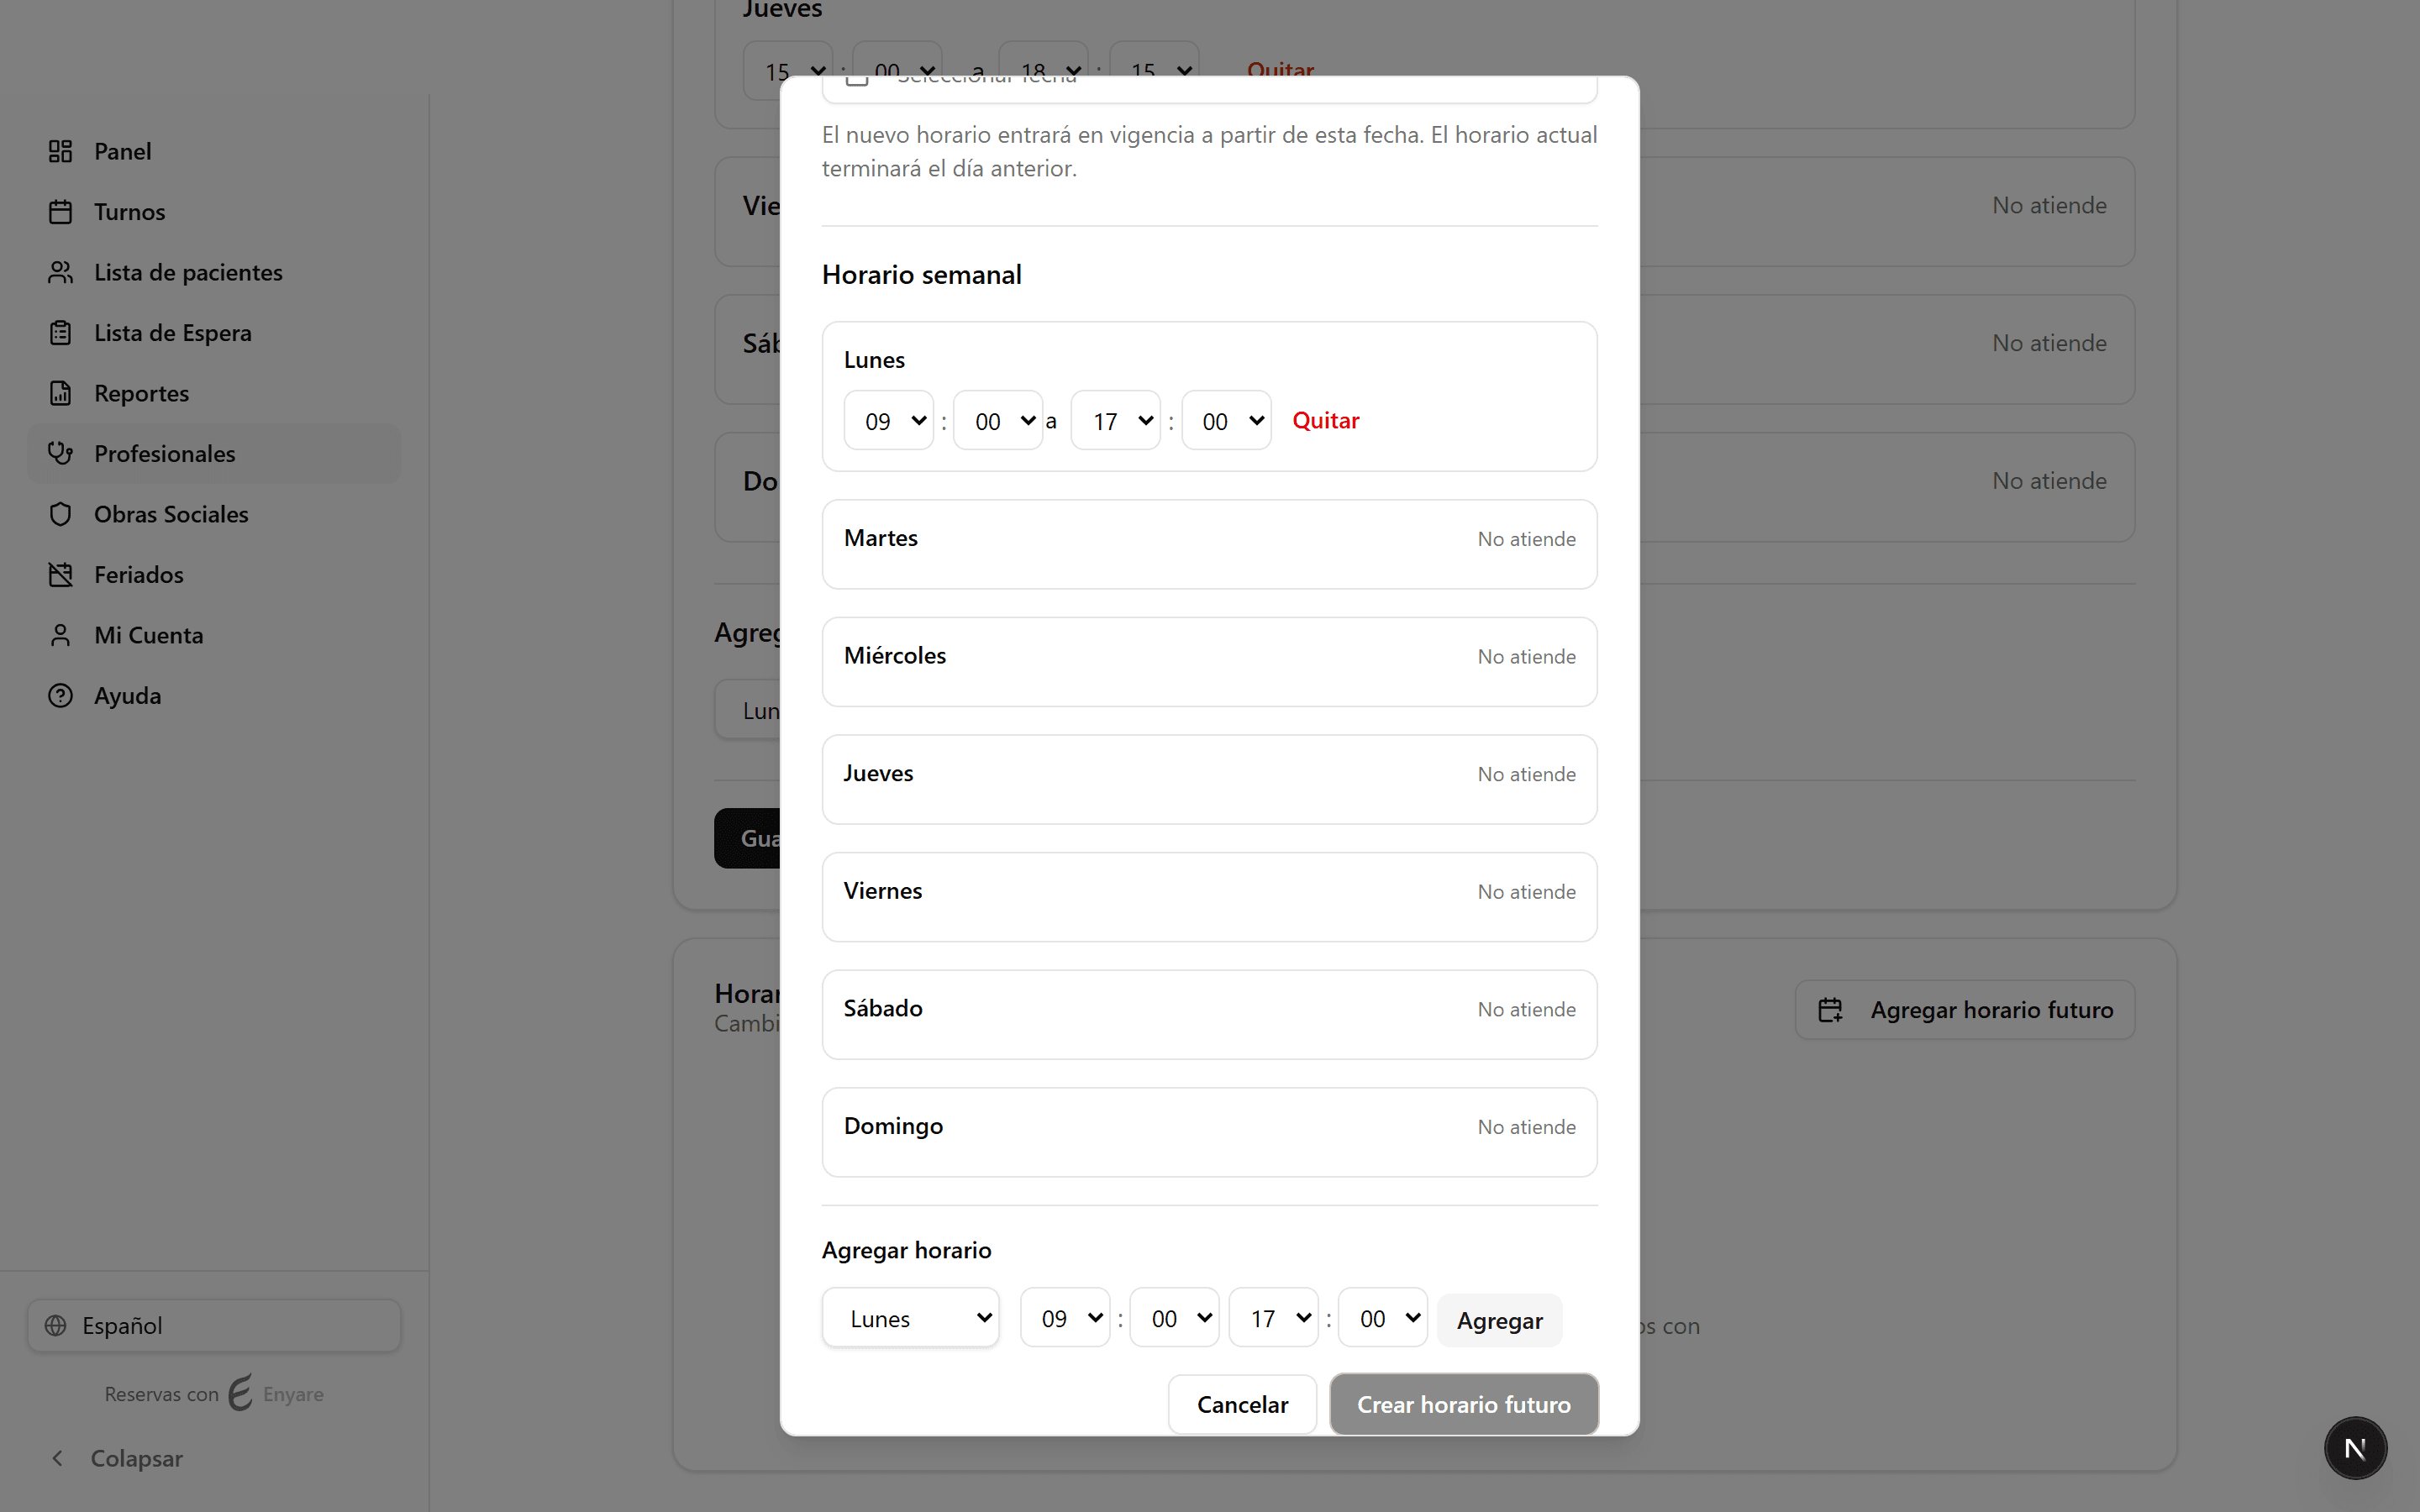
Choose when it starts
Under “Effective from”, pick the date the new schedule begins. The current schedule stays in effect until the day before and is replaced automatically from that date.
- 4
Build the new schedule and create
Add each day's time ranges just like the weekly schedule (day, start and end time, “Add”). When it's ready, click “Create future schedule”.
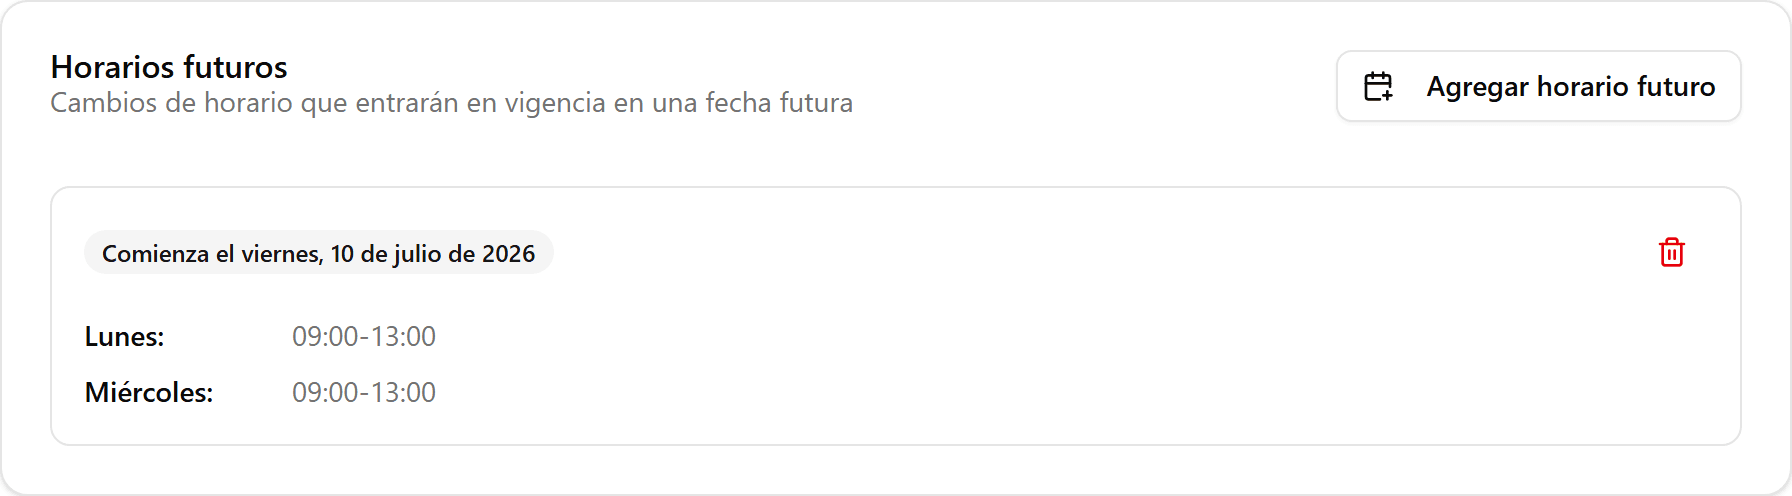
- 5
It's scheduled
The new schedule appears as a card under “Future schedules” with its start date. You can add several, or delete one with the trash icon while it hasn't taken effect yet.