Programar un cambio de horario a futuro
- 1
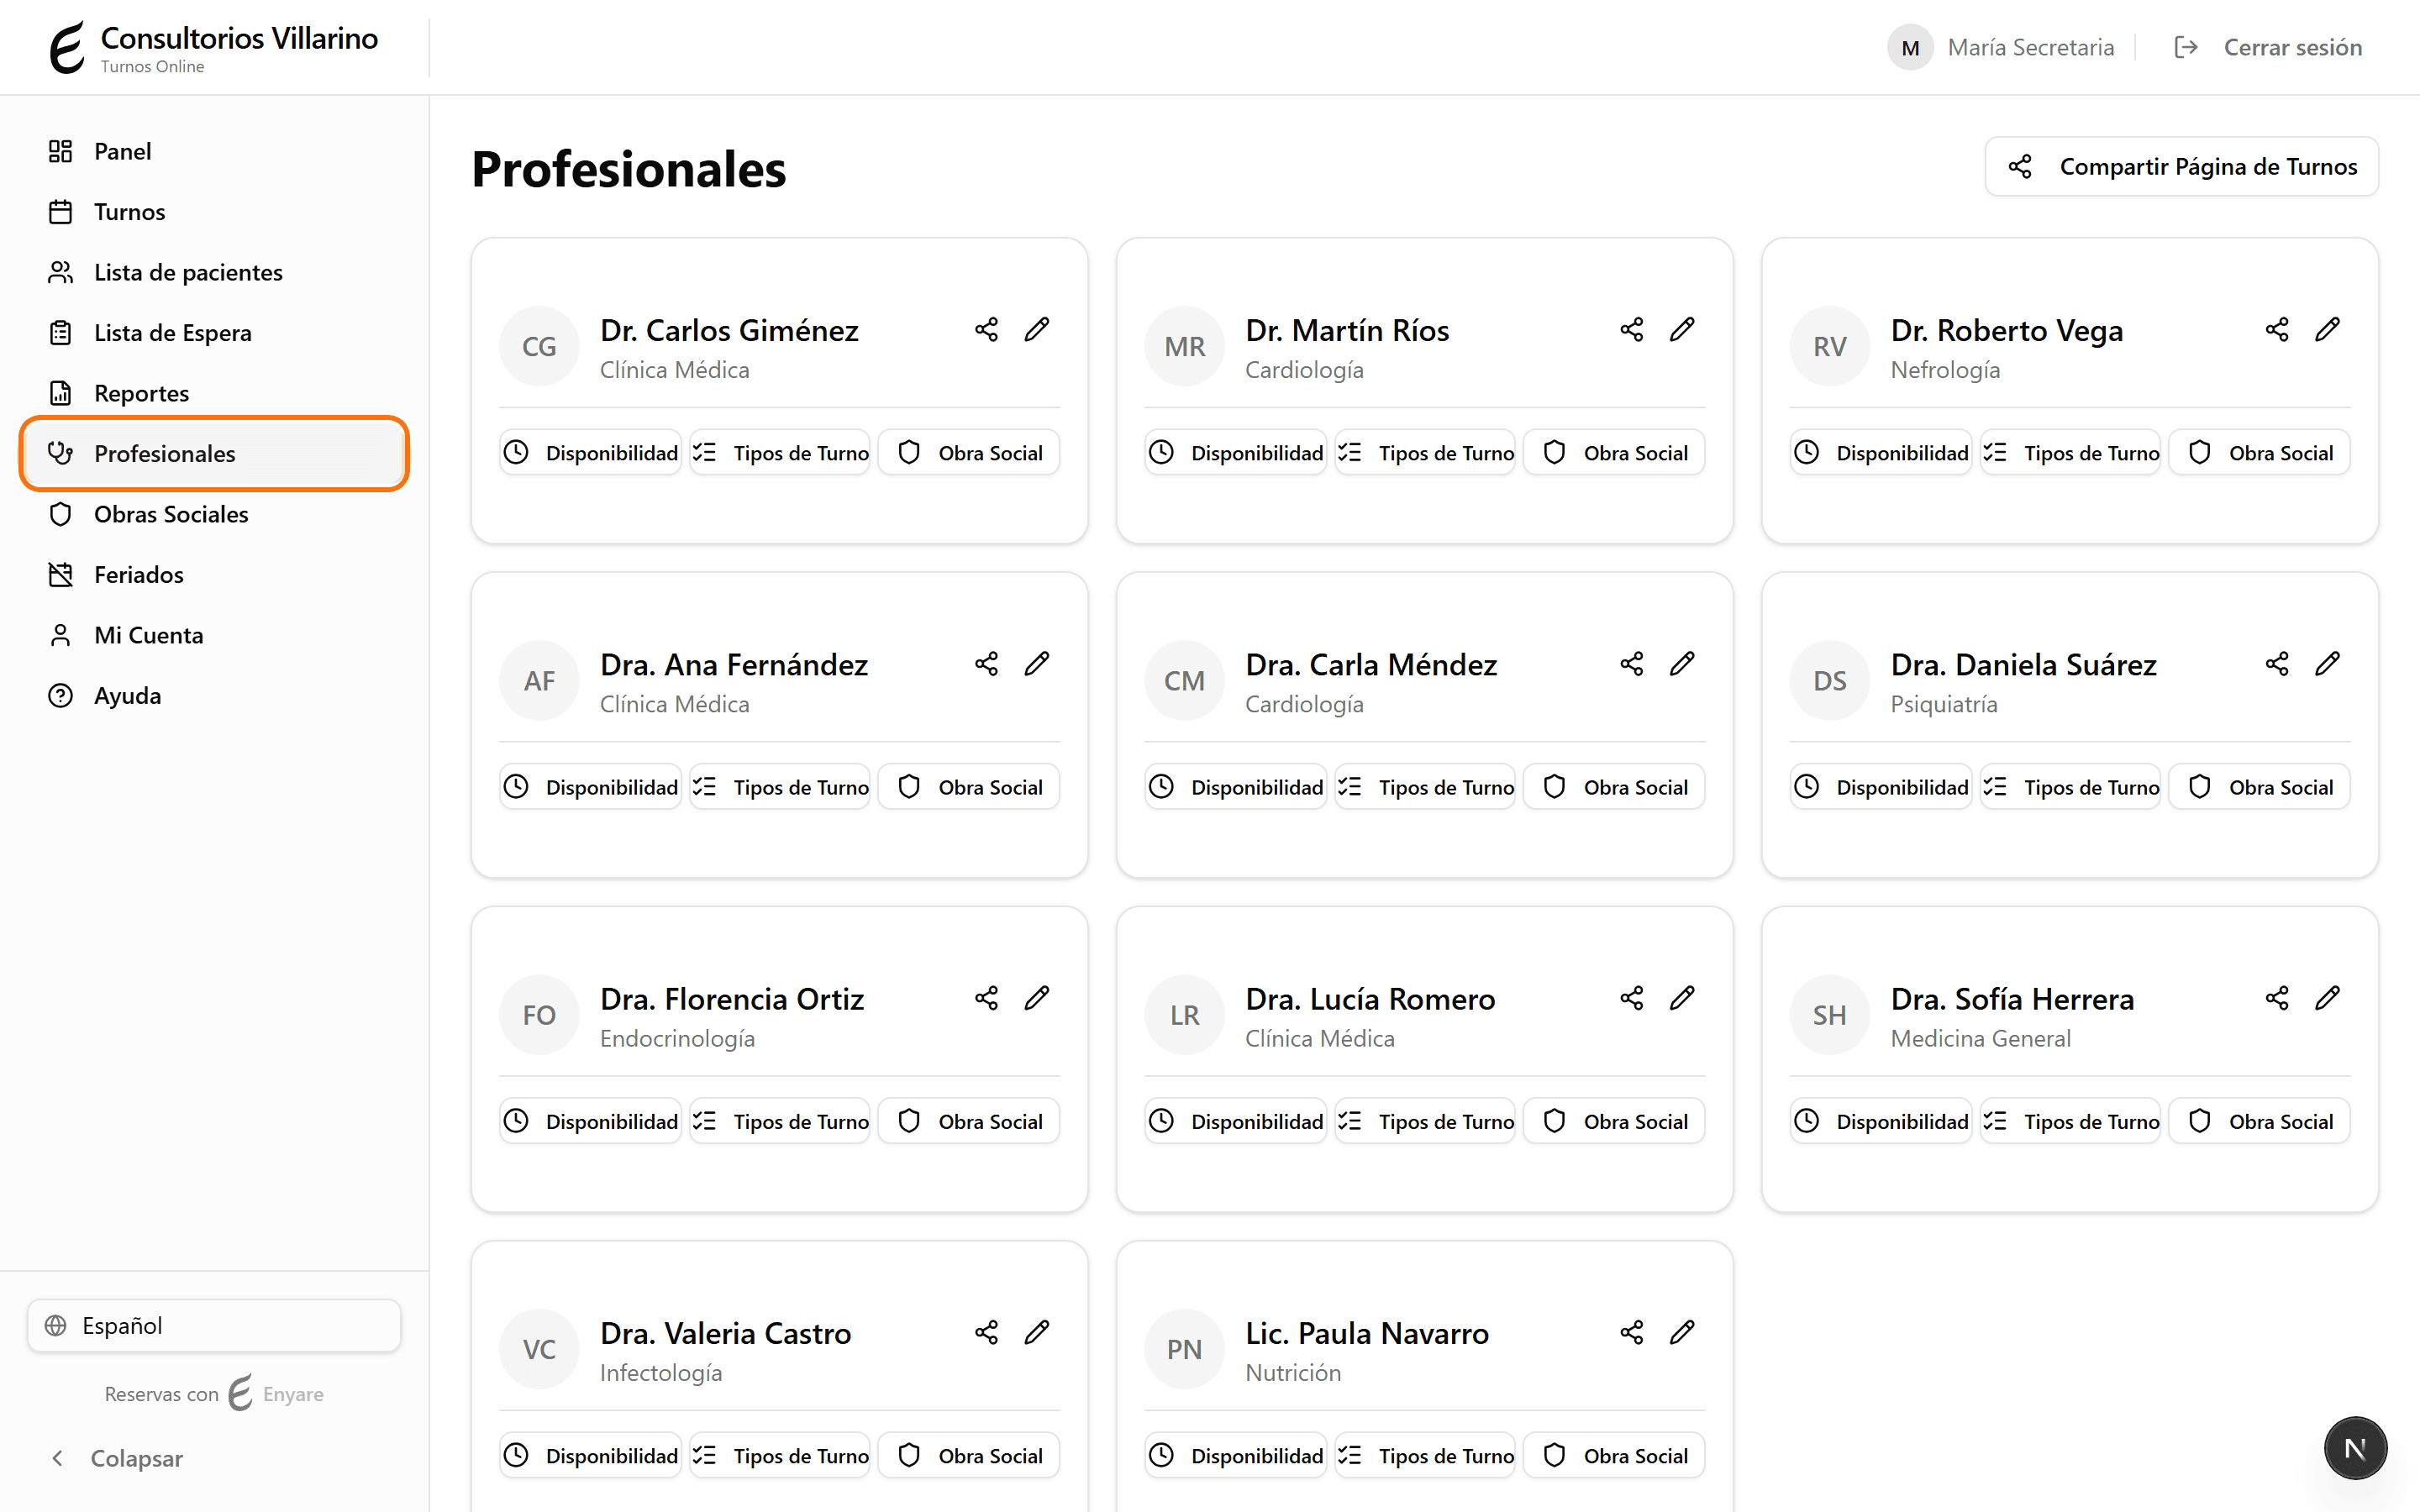
Abrí «Disponibilidad» del profesional
En el menú lateral, abrí «Profesionales», entrá al profesional y hacé clic en «Disponibilidad». Vas a ver la pestaña «Horario semanal» con el horario actual.
- 2
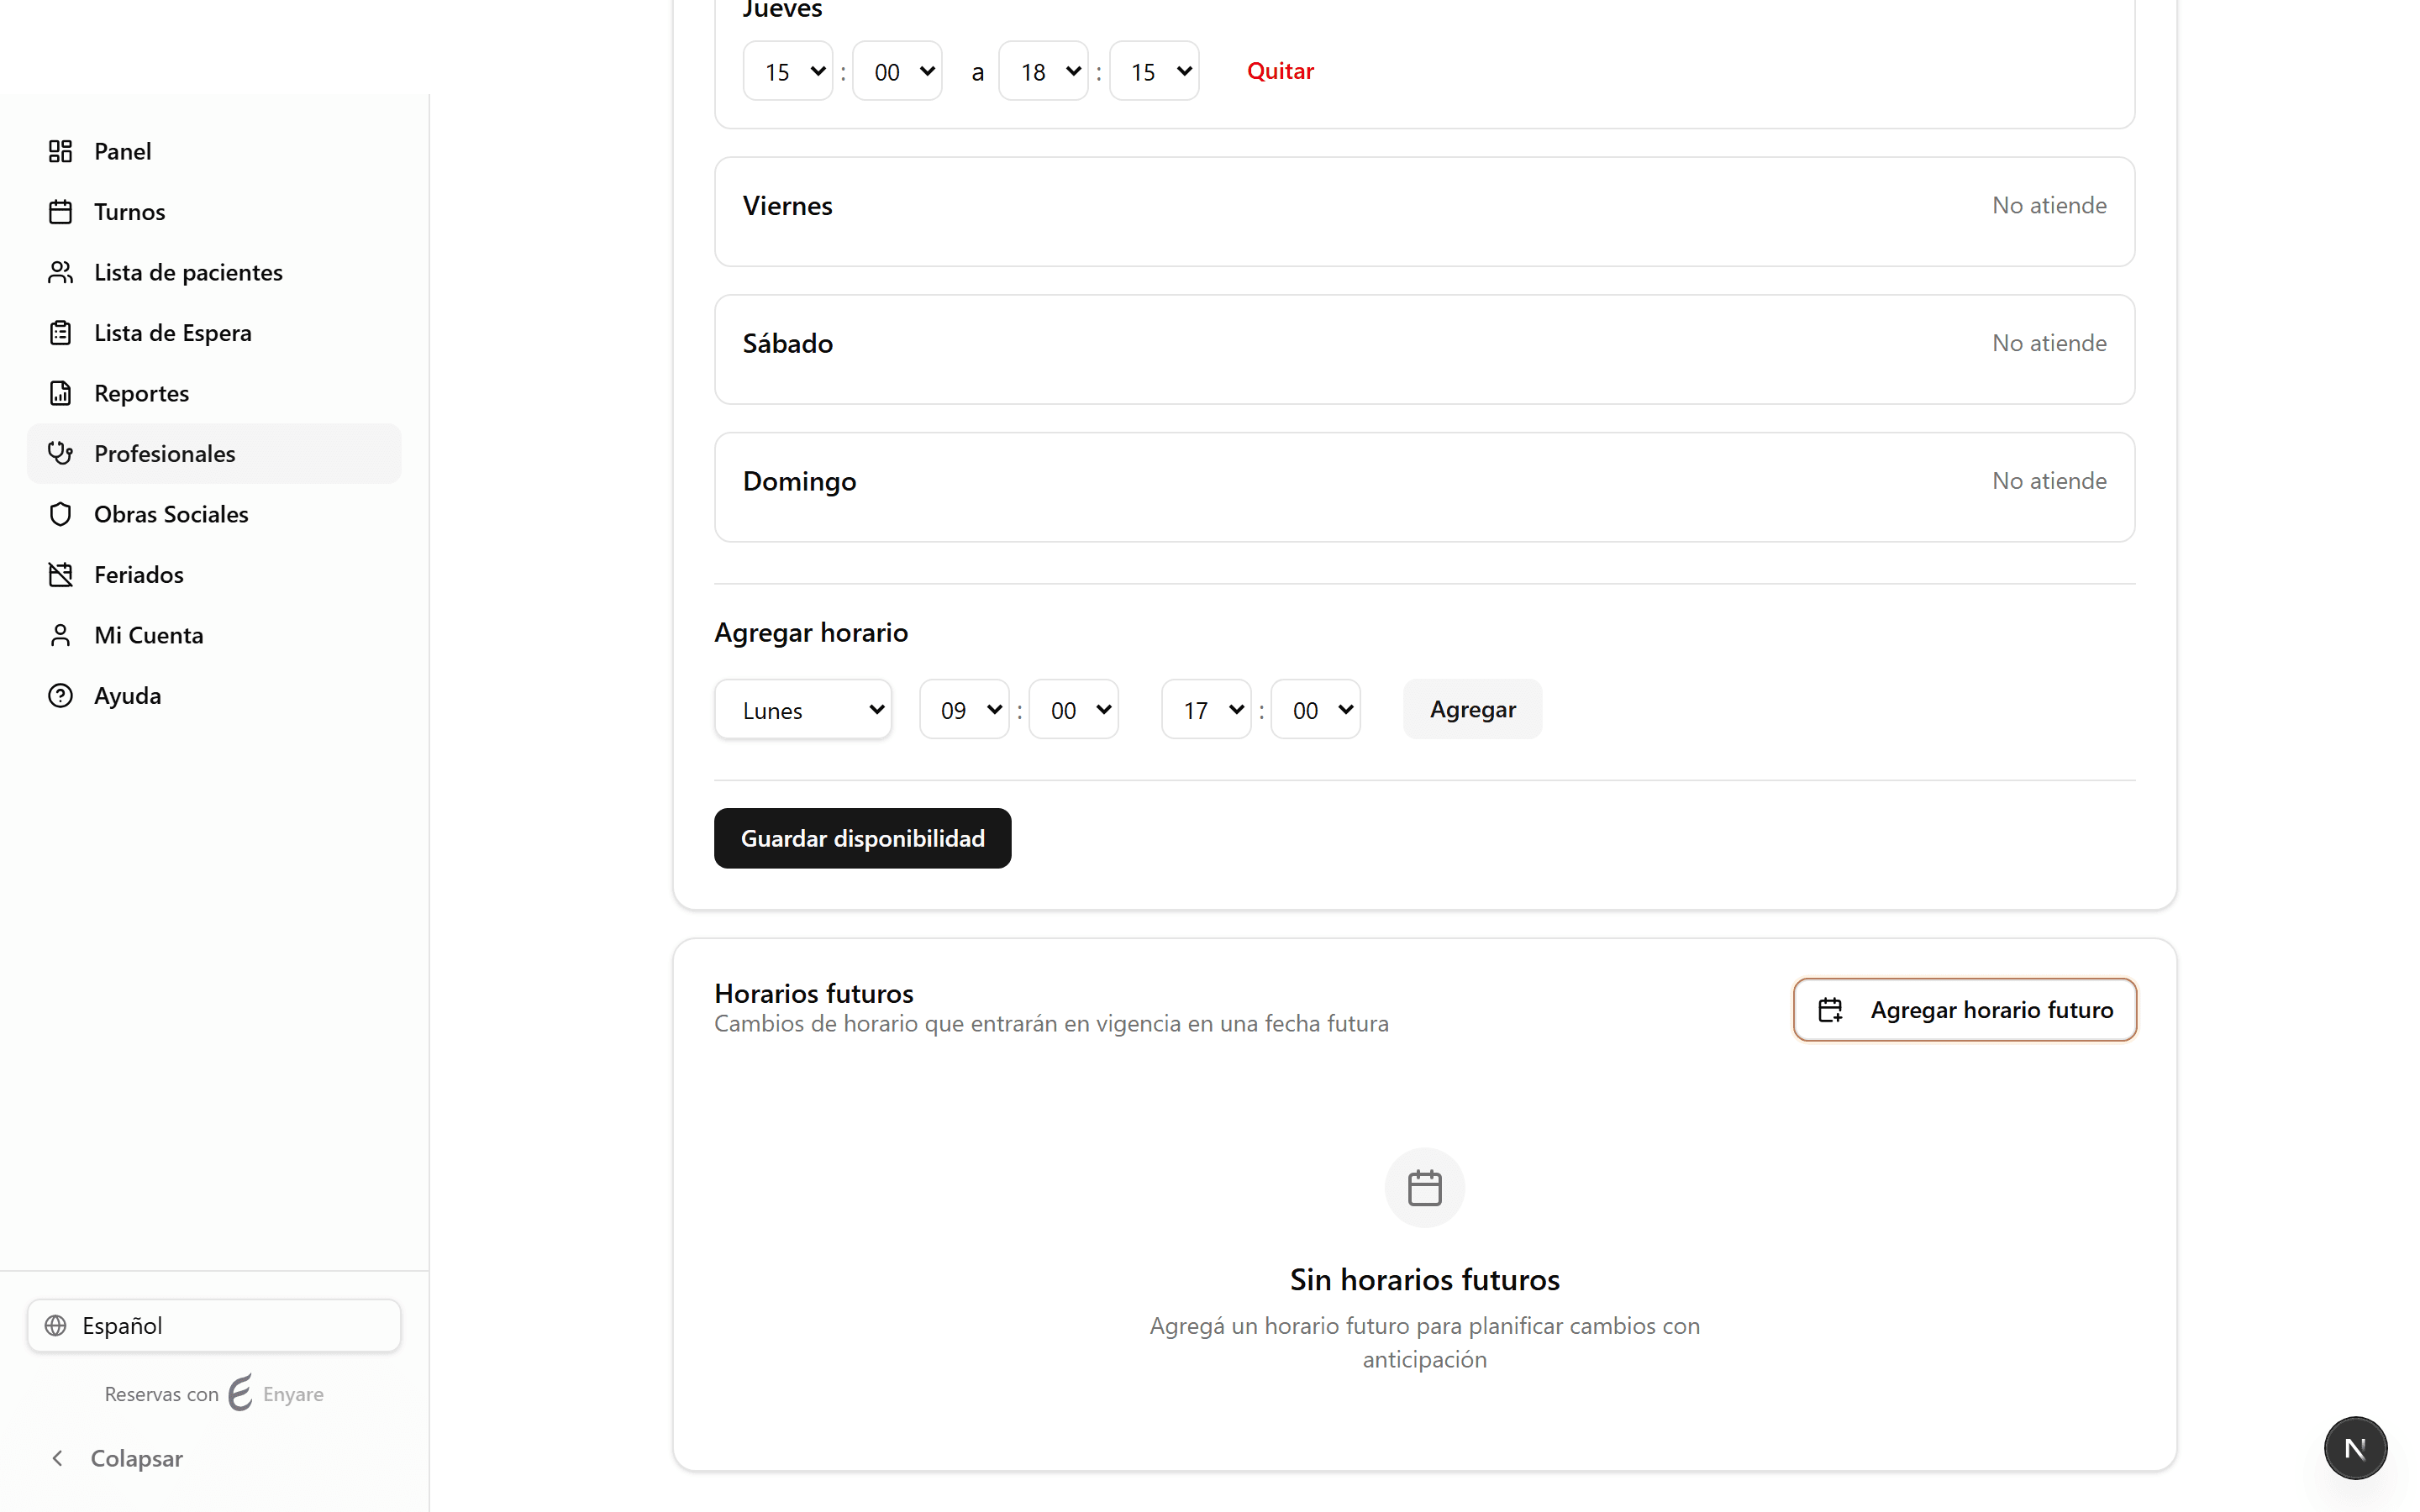
Buscá «Horarios futuros»
Debajo del horario semanal está la sección «Horarios futuros», para cambios que entran en vigencia más adelante (el horario semanal de arriba se aplica al instante; este no). Hacé clic en «Agregar horario futuro».
- 3
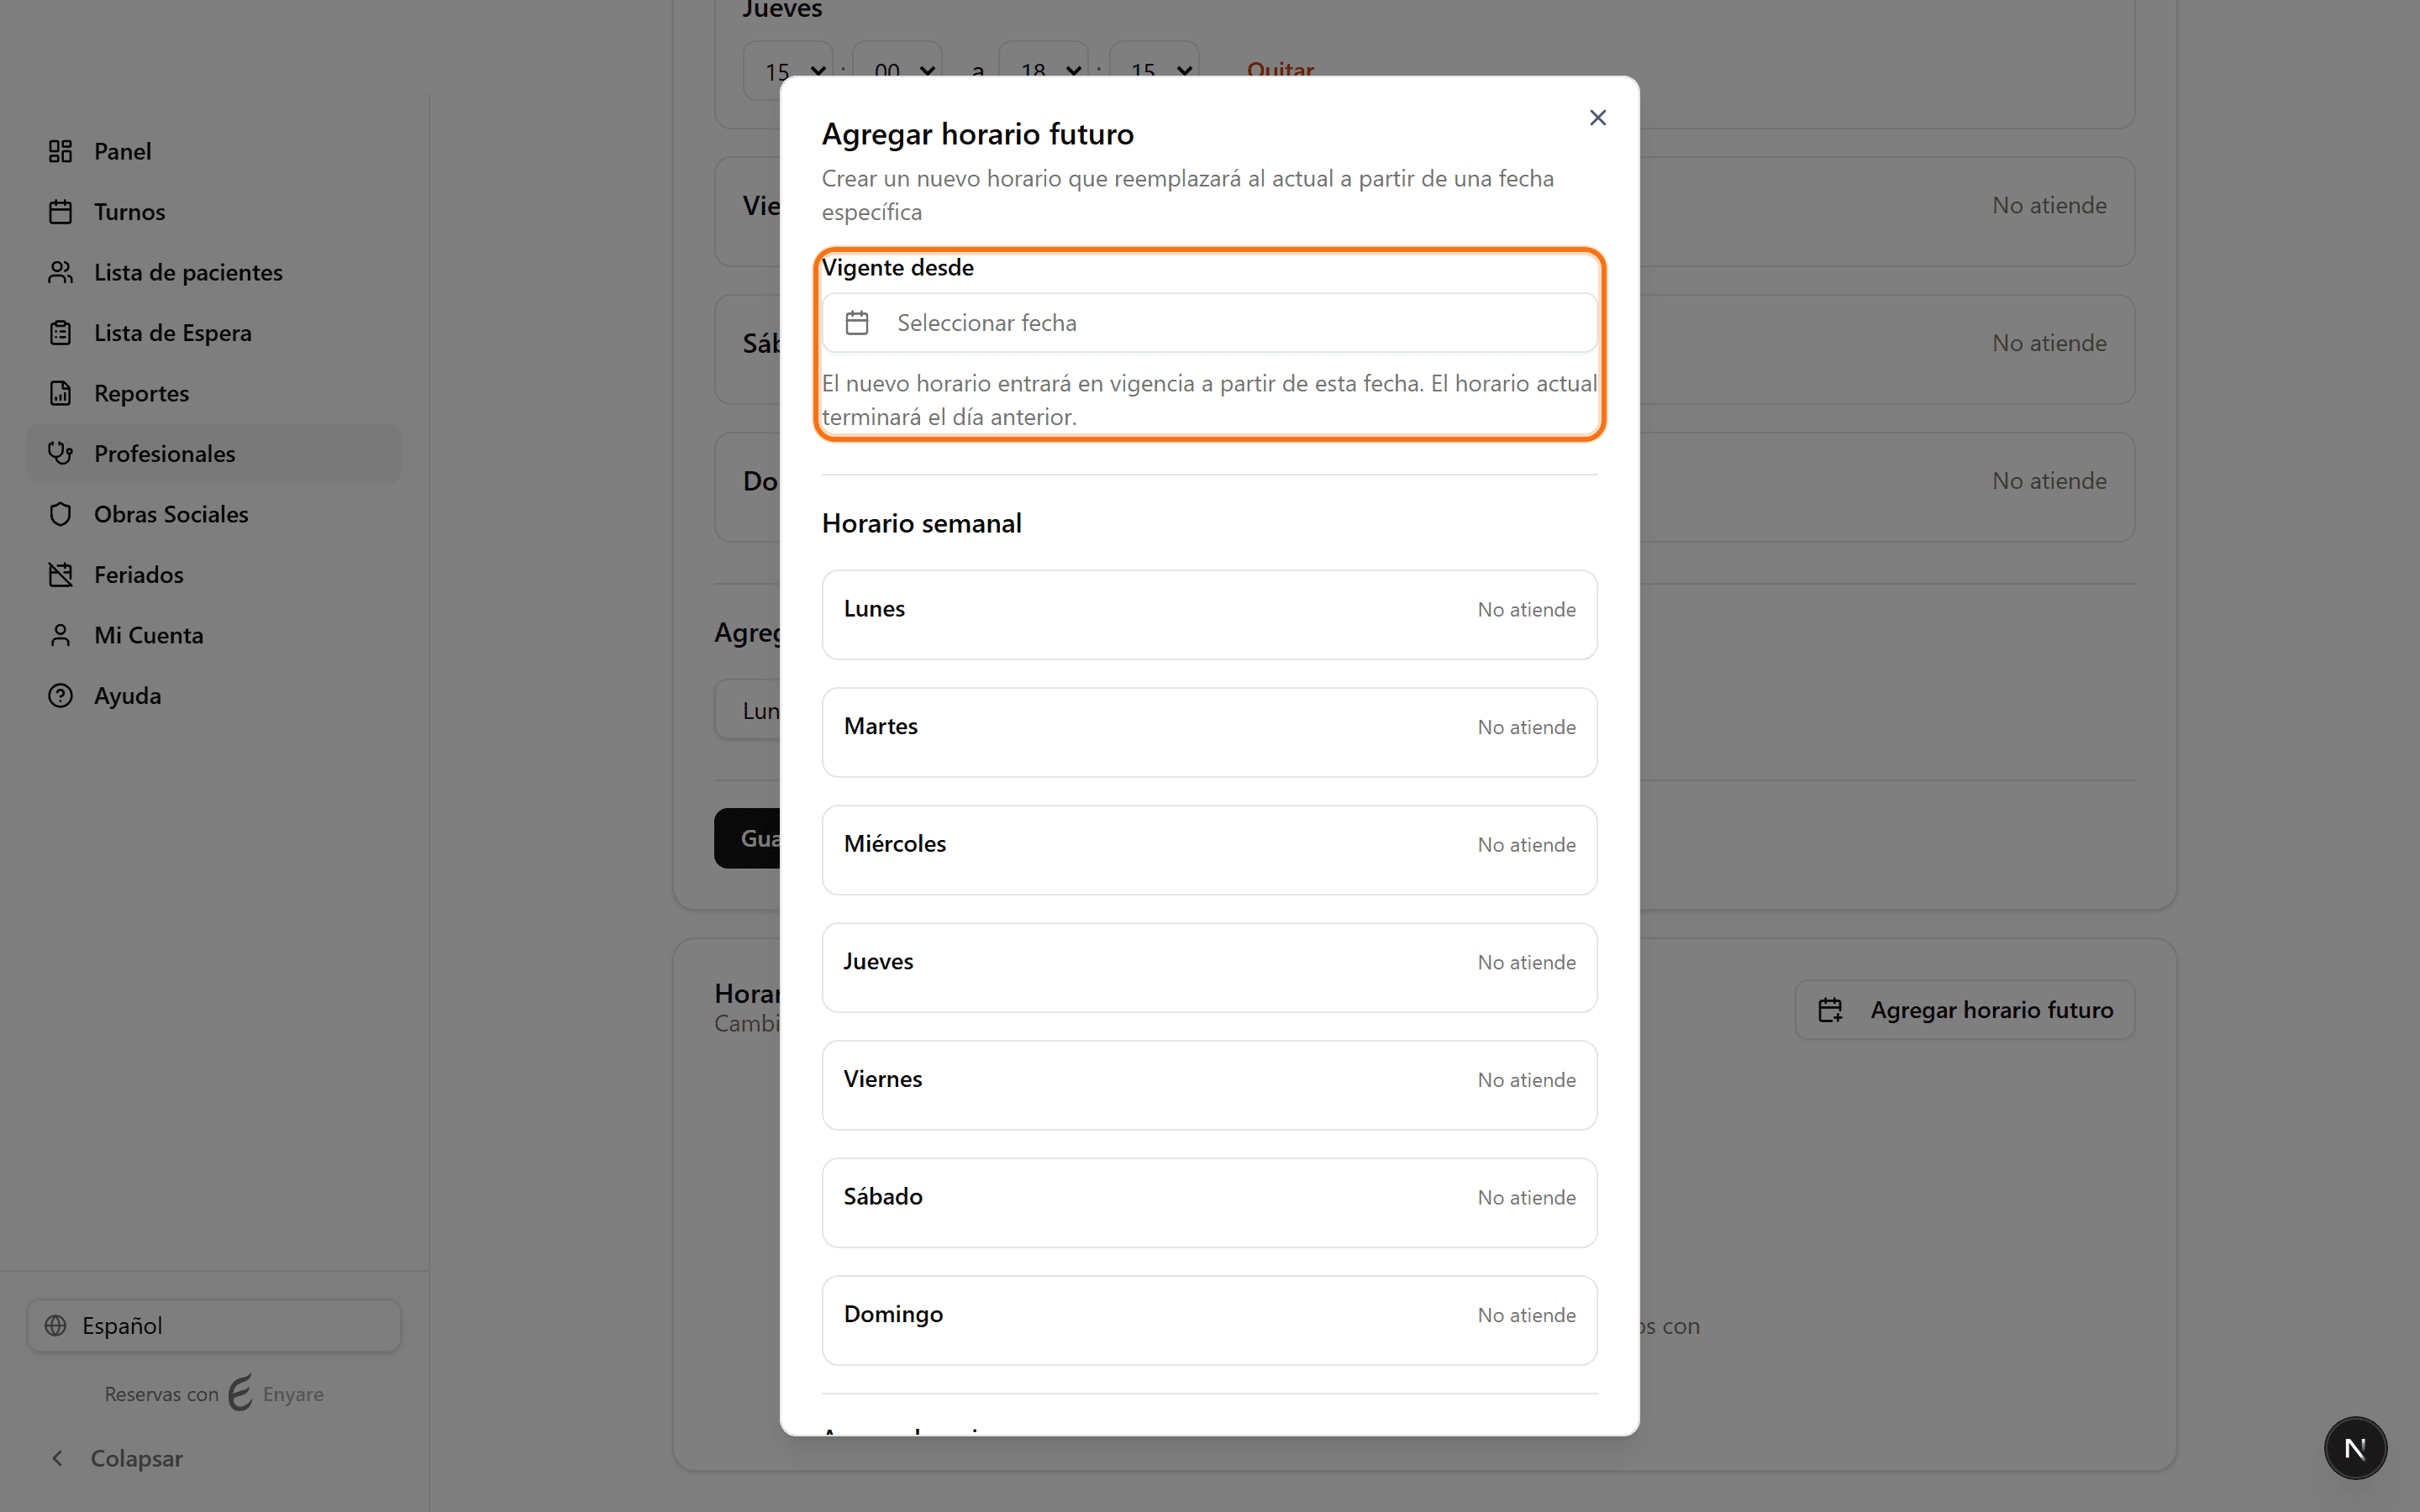
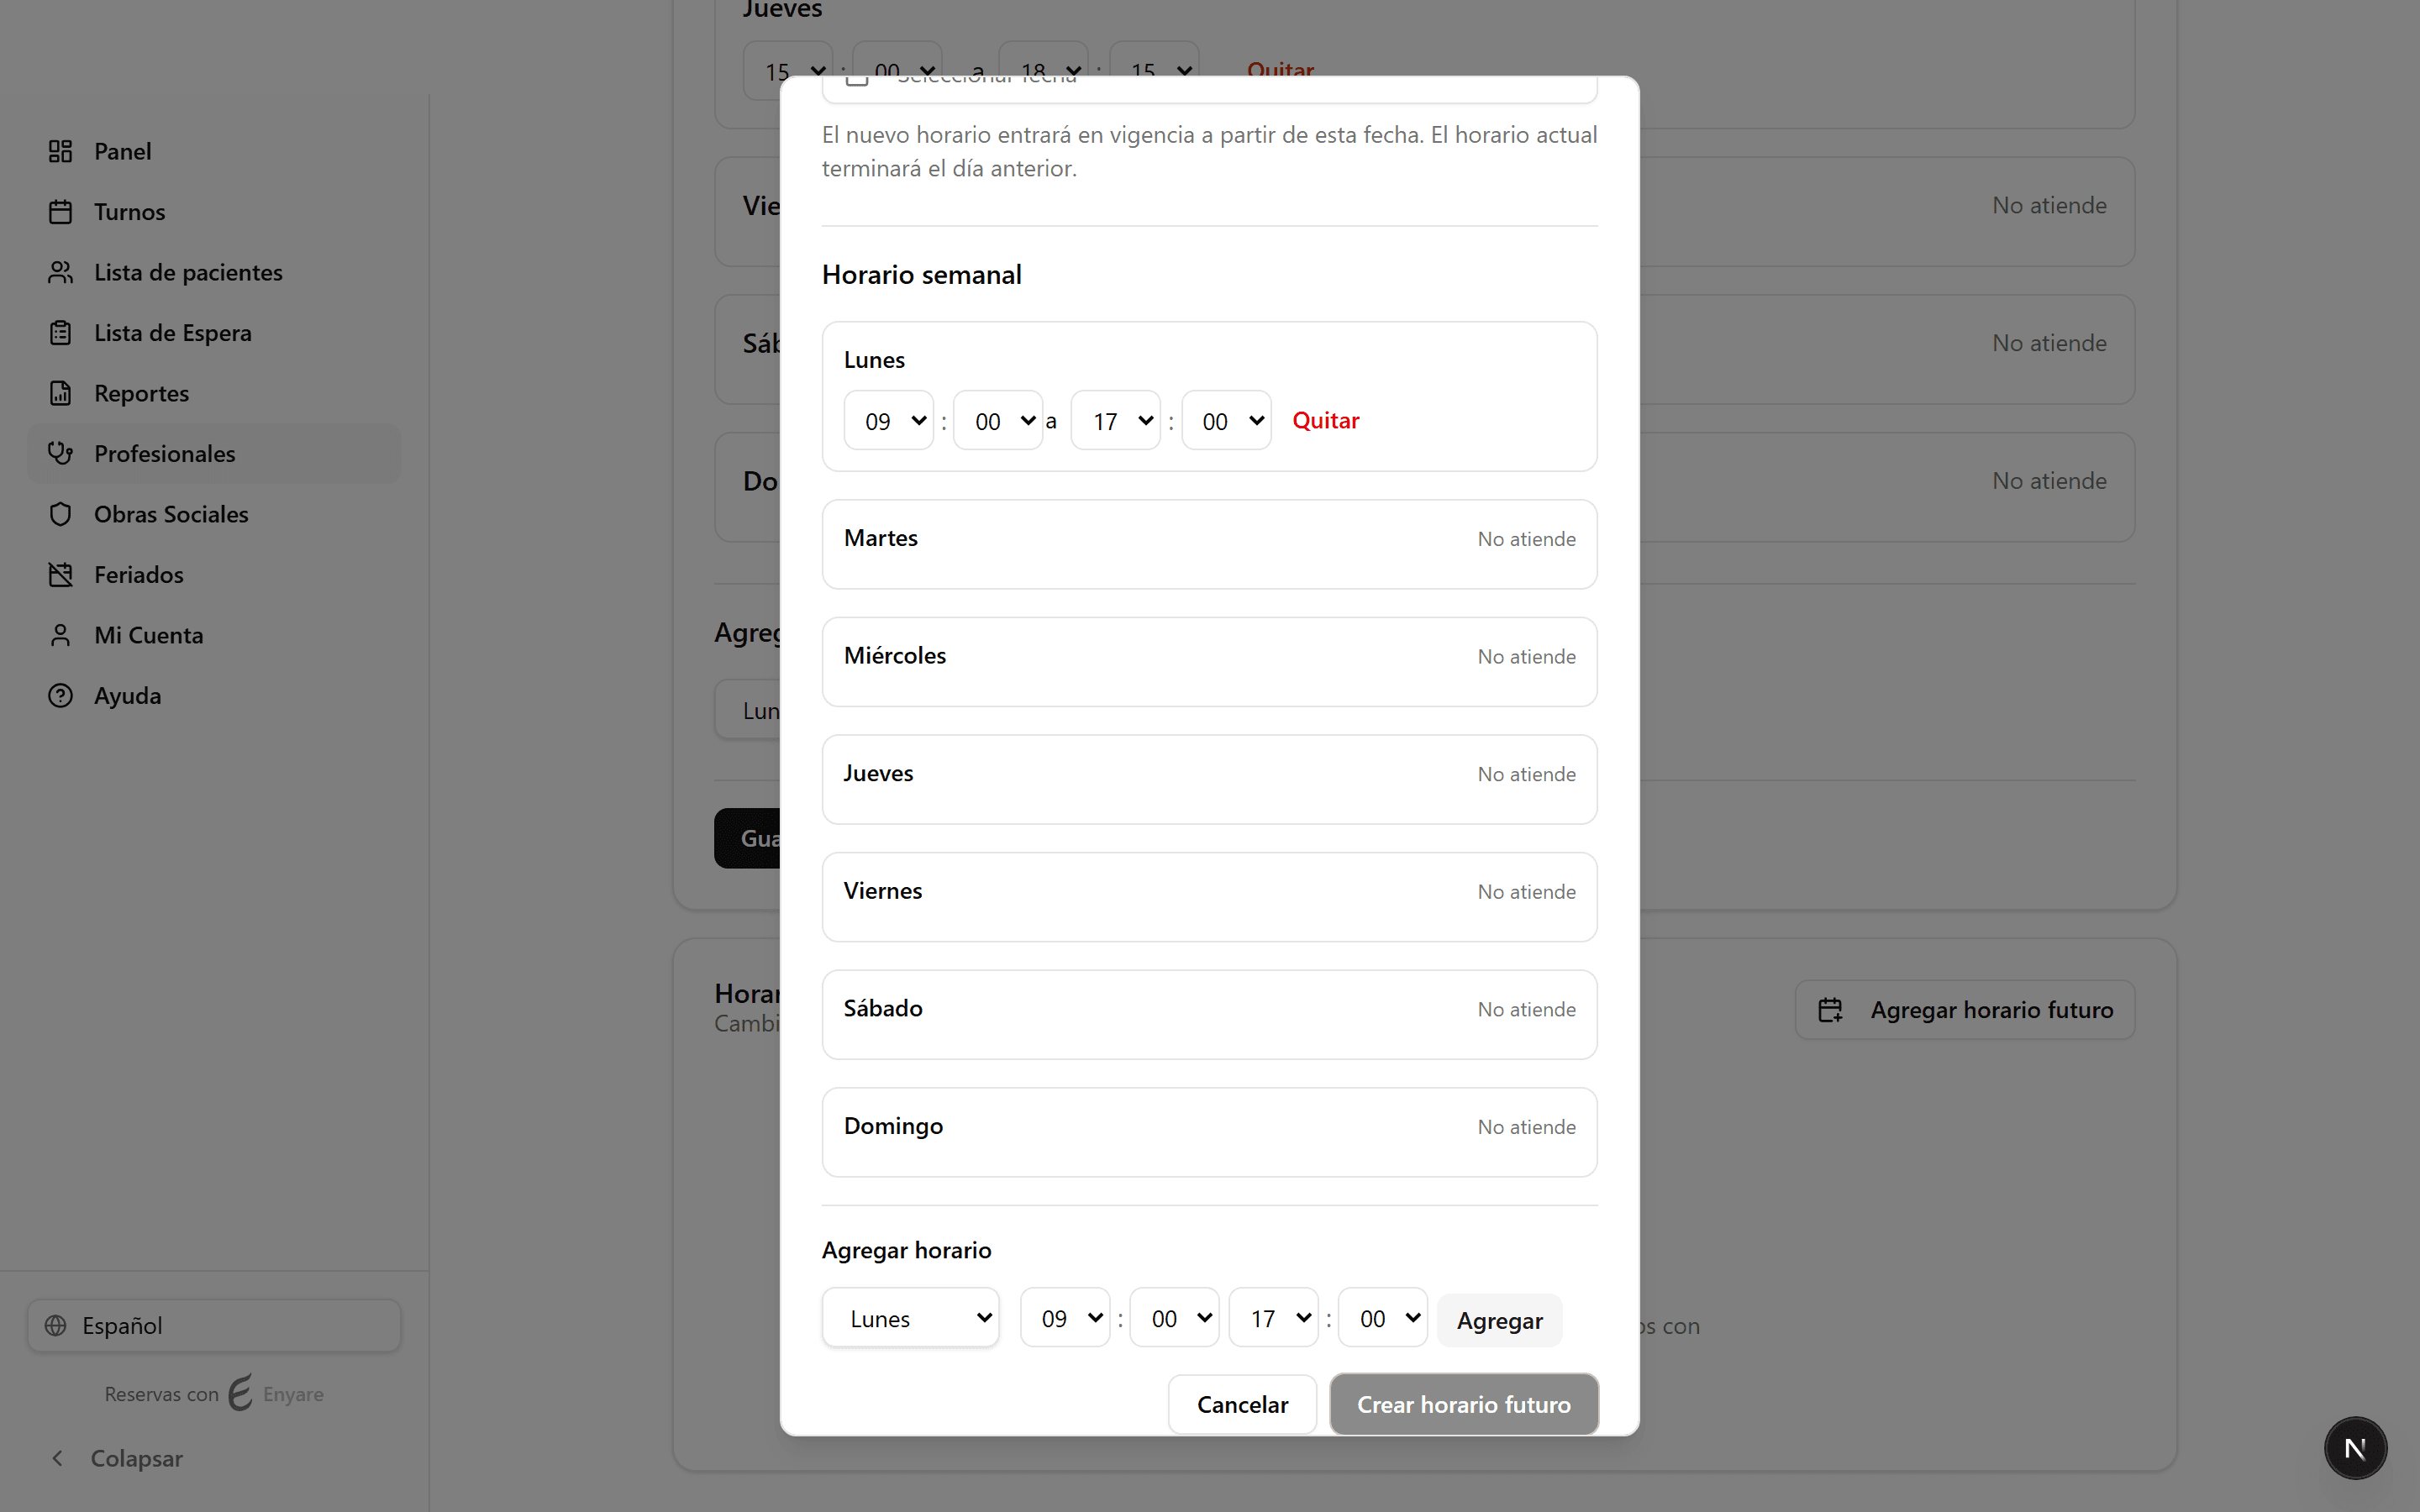
Elegí desde cuándo rige
En «Vigente desde», elegí la fecha en la que arranca el nuevo horario. El horario actual sigue vigente hasta el día anterior y se reemplaza automáticamente desde esa fecha.
- 4
Armá el nuevo horario y creá
Agregá los tramos de cada día igual que en el horario semanal (día, hora de inicio y fin, «Agregar»). Cuando esté listo, hacé clic en «Crear horario futuro».
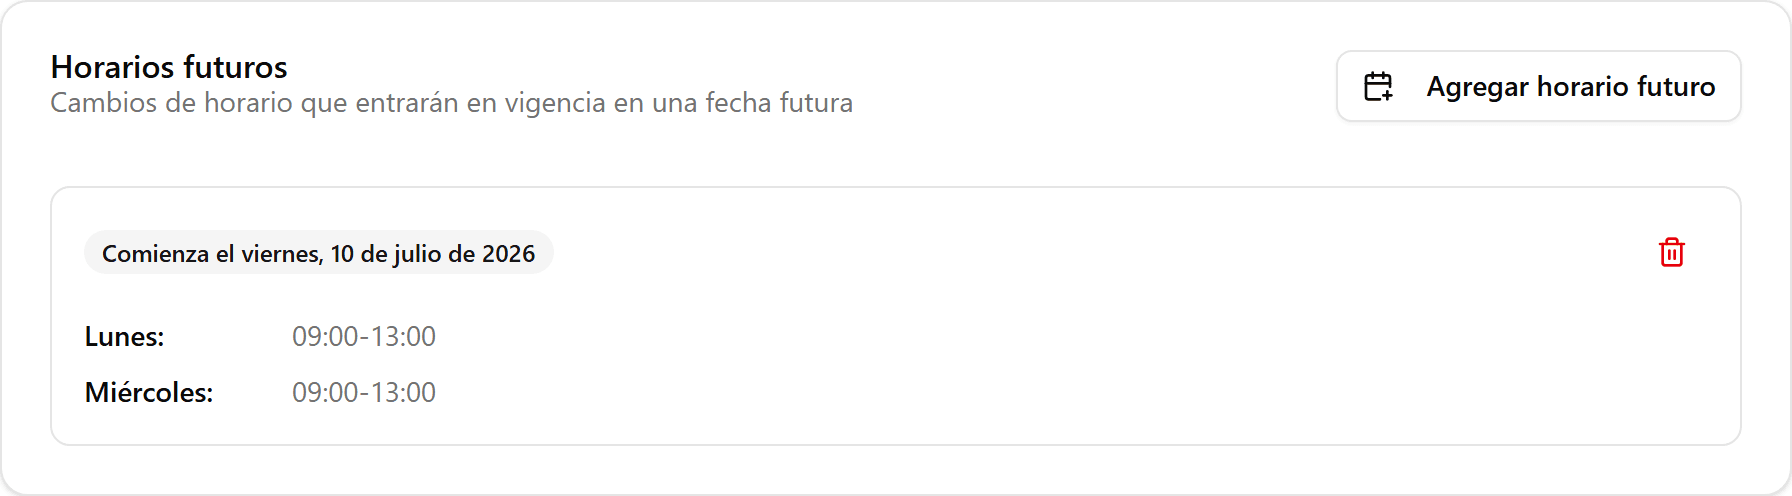
- 5
Queda agendado
El nuevo horario aparece como una tarjeta en «Horarios futuros» con la fecha en que comienza. Podés crear varios o eliminarlos con el ícono de papelera mientras no hayan entrado en vigencia.